Saturday, July 31, 2010

Chinese Sesame Chicken


There are two types of Chinese food: American Chinese food and actual Chinese food from China. Both have their pluses and minuses. American Chinese food can be delicious (in the realm of guilty pleasure) as you are eating it, but give yourself 5 minutes and you start feeling that stomach-aching regret. Chinese-Chinese food is typically not so super-greasy (non-street food, that is...) and the flavors are much more tasty and resemble the original ingredients (aka not covered in fried dough). The down-side, though, is the quality of the meat. While on a recent trip to China, I was repeatedly disappointed with the slimy chicken, the slimy beef, and the, well, slimy shrimp. It's as if you are eating the meat that was rejected in the United States and barely survived the plane ride to China.

So now that I have whetted your appetite, let's get cookin'! Actually, this dish combines the best of both cuisines: the deliciousness of authentic Chinese ingredients and flavors and chicken from your American grocery store (although I can't promise you that your local American-Chinese restaurant uses meat of the same quality)! What a perfect combination.

Sesame Chicken (Food for Four):
- 3-pack of chicken breasts (yay for American meat!)
- 2 tbs. of water
- 2 tbs. rice vinegar (seasoned or unseasoned)
- 2 tbs. soy sauce
- 2 tsp. sugar
- 1/2 tsp. hot red pepper flakes
- 3 tbs. vegetable oil
- 1 large onion
- 3/4 lb. mushrooms (we bought the gourmet pack--shiitake are best)
- 1 1/2 cups sugar snap peas
- 2 tbs. sesame seeds
- Salt and Pepper

This dish is perfect over rice. I cooked up some instant brown rice to serve with this dish--I highly recommend Success brown rice--about 2-3 packets would do for this dish.

Grab your onion, cut it in half from top to bottom and then cut into thin slices.


Start heating up your wok over medium-high heat until a drop of water immediately sizzles and evaporates on the surface of the wok. While the wok is heating up, pull out the chicken and cut across the breast, creating 1/4-inch thick slices of chicken. Season with plenty of salt and a bit of black pepper.


Add 1 tbs. of oil and coat the wok evenly. Allow the oil to heat up a bit and then add the onion slices with some salt and black pepper. Cook the onions until they start to brown, stirring frequently.


While the onions are cooking, stir together the water, vinegar, soy sauce, sugar and red pepper flakes in a bowl until the sugar has dissolved.


When the onions are done, transfer them into a large bowl. Add another tbs. of oil to the wok, let it heat up, and then add the chicken.


The chicken should take a couple of minutes to cook--remove once it has been cooked through and add to the bowl with the onions.


While the chicken is cooking, pull out a small frying pan and toast the sesame seeds over medium-low heat. Just keep an eye on the seeds as you finish up the rest of the meal. Remove them from the heat when they have turned a slightly darker shade of brown.


Back to the wok! Add the last tbs. of oil and let it heat up. Then add the mushrooms and sugar snap peas. Season with salt and black pepper.


Cook for about 5 minutes until the mushrooms and peas are tender. Then transfer them to that same big bowl.


Add the soy-vinegar mixture and the toasted sesame seeds to the wok and bring to a boil.


Immediately add the contents of the big bowl (mushrooms, sugar snap peas, chicken and onion). Cook for about 1-2 minutes until heated through.


Serve over brown rice (or whatever rice you choose) and add some more salt and pepper if necessary! 慢慢吃! (Mandarin translation for Bon appétit...aka "eat slowly." Really?)


Credits: My Chinese Sesame Chicken recipe is adapted from a Gourmet recipe that I found online. The photos are of our cooking process.

Thursday, July 22, 2010

Veal Saltimbocca


The recipe that I am sharing with you today is one of my favorite Italian dishes.  If you like butter, you are in for the time of your life.  The cooking style of "saltimbocca" has been around for centuries--veal saltimbocca is probably the most popular version, but you can also cook chicken and, I would imagine, other meats in this style.  I utilized my favorite online translation dictionary and discovered, to my dismay, that the English translation of saltimbocca is "slice of veal rolled with ham and sage and shallow-fried."  Seriously?  After a bit more digging, I discovered that the roots of the word quite possibly mean "jumps in the mouth."  The Italian verb "saltare" means "to jump" and the word "bocca" is Italian for "mouth."  Now THAT was what I was looking for!  This dish does exactly that--it is delectable.

The main idea is that you pan fry (in BUTTER, of course) this slices of veal that have been seasoned with sage and folded in half with prosciutto stuffed in the middle.  Once the veal is cooked, you remove it from the pan and add MORE butter and white wine to create a delightful sauce.  Some chefs will also add capers to the dish.  There is also "saltimbocca alla Romana" which means that the sauce contains Marsala instead of white wine.  But however this dish is cooked, I guarantee that it will make your bocca water...
Required Ingredients for Veal Saltimbocca (Food for Four):

- 1 lb. of veal scaloppini (thinly sliced veal--should be available in the meat department of your grocery store) 
- 1/4 lb. prosciutto, thinly sliced 
- 1 1/2 sticks (12 tbs.) of butter 
- 1 cup of white wine (I just use cooking white wine) 
- Flour (to coat veal) 
- Several tsp. of rubbed sage 
- Salt and Pepper 
- Toothpicks

I served this dish on top of spaghetti and with a side of sautéed squash and zucchini.  If you choose to cook with these items--the sauce from the veal will be a more-than-suitable topping for the spaghetti--you should also grab the following:

- 1 lb. spaghetti
- 2 small yellow squashes
- 2 zucchinis
- Minced garlic (I like to have a big container in my fridge--I use it ALL the time)
- Olive oil (Extra virgin, of course)

Go ahead and start heating up water for the spaghetti (add some salt to the water if you desire).  As the water is coming to a boil, start preparing your veal.  Put a sheet of parchment/wax paper on a cutting board.  Lay out the pieces of veal (you will probably need to do this in two batches) and cover with another piece of parchment/wax paper.  Now pull out your meat tenderizer (a mallet or even a hammer can do the job if you're desperate).  Start pounding so that the veal ends up being about 1/4 inch thick.


Now season each piece of veal with some pepper and rubbed sage (eyeball it).  Then put a piece of prosciutto on top of each piece of veal.


Fold each piece of veal/prosciutto in half and then secure with a toothpick.


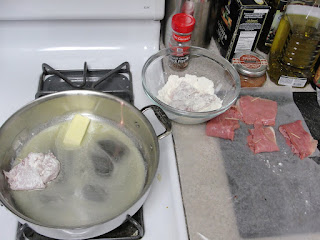
Pull out a sauté pan and melt a 1/2 stick of butter 4 tbs.) at medium-high heat.  While melting, put some flour in a bowl.  Once the butter has melted (I was hungry...I didn't wait), coat each piece of veal/prosciutto in flour and then add to the pan.


Each side of the veal should cook for about 3 minutes (6 minutes total).


Once they have cooked, put the veal on a plate and cover with aluminum foil so that they stay warm.  If you had to do this in two batches, repeat all previous instructions (but you don't need to add any more butter to the pan).  Once you have put the last batch in the pan to cook, you should now chop up your zucchini and squash into 1-inch chunks.  Remember to flip over your veal, though!  Heat up about a teaspoon of olive oil in a frying pan over medium heat and add another teaspoon of minced garlic.  Once the garlic starts to sizzle, add the zucchini and squash chunks and top with some salt and pepper.


Don't forget to remove the veal from the heat and to add the spaghetti to the water once it has boiled.  The zucchini and squash will cook (make sure to toss them around a bit while they cook so they don't stick to the bottom of the pan) while you make the butter-wine sauce that will top your veal and spaghetti.  In the same pan that you cooked the veal, add 1 cup of white (cooking) wine.


Bring it to a boil and let it reduce for 10 minutes over medium to medium-high heat.  While it's reducing, make sure to scrape up some of the veal goodness that was left behind!  After those 10 minutes, reduce the heat on your wine to low and also reduce the heat on your zucchini and squash to low.


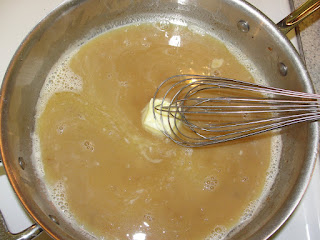
Make sure not to forget about your spaghetti...Now whisk 1 stick of butter in with the wine a bit at a time (don't add the whole stick at once).


Once all of it has been added, you are done!  Put a pile of spaghetti on a plate and top with a few pieces of veal and THE SAUCE.  And serve with a side of zucchini/squash and a slice of lemon.  Buon appetito!

Friday, July 16, 2010

Red, White Lobster Roll and Blue Cheese Butter Lettuce Salad


When thinking about my second blog post, I decided that I didn’t want to set a precedent that I would be traveling every month to some exotic location so that I could fill my blog with interesting cuisines and recipes.  This is not financially sustainable (although it would be ideal…).  I also didn’t want people to think that I was trying to disassociate myself from my own country, which happens to offer up some pretty fantastic culinary options.  Hence, I decided to blog about perhaps my second favorite food (after good steak), which just happens to be very American: LOBSTER. Turf, then surf.

In the spirit of the recent celebration of our American independence, did you know that the U.S. is the number two lobster producer in the world?  You may think that number two is not good enough.  Well, you know what Canada?  You are the number one producer of AMERICAN lobster.  The species is named after US (I don’t care if you claim that it is referring to North America…the name is definitely connected with the United States of AMERICA).  Therefore, I believe that lobster is pretty much up there with bald eagles and American pie.  Canada also has bald eagles—but who thinks of them as Canadian?  I sure don’t. 

Now, like most of you, when I think of lobster, I think of Maine, or at least of New England, in general.  What else do you associate with New England?  Maybe specifically in the state of Vermont?  DAIRY.  What is my favorite dairy product?  CHEESE.  Now, in keeping with the patriotism of this blog entry, what is the most American cheese?  Blue cheese.  The lobster will be red, the bread from the lobster roll will be white, and the cheese that will be used to create a salad dressing that will go on top of a delightful selection of butter lettuce will be BLUE (work with me here).  And everything will be delicious.  By the way - butter lettuce is also called BOSTON lettuce.  I am on a ROLL!

Okay, so lobster may be intimidating for some of you cooks out there--but most seafood sections of grocery stores sell small lobster tails for much cheaper than you would expect, and they are super easy to cook.  For this recipe, I bought two 4 ounce tails for $5.99 each.  Not too bad.  But I will concede that trying to make a big lobster roll full of lobster meat can become expensive.  So I am cheating a bit with this one—I am supplementing some nice juicy lobster tail with some imitation crab meat that requires absolutely no preparation.  If you feel like shelling out the big bucks and buying more lobster, be my guest.  I envy you.


Required Ingredients (Food for Two—Double it for Four):
- Two 4 oz. lobster tails (uncooked)
- 1 medium package of imitation crab meat (preferably in “clusters”—should be available in the seafood section of a grocery store)
- 2 white sub rolls
- 3 tbs. and 1 1/2 tbs. mayonnaise (separated)
- 2 1/2 cups of butter lettuce (I buy the 6.5 oz. bag of Fresh Express Sweet Butter in the produce section—a head of butter lettuce works, as well)
- 6 slices of bacon
- 1/4 cup dried cherries (dried cranberries are a good substitute)
- 1 tbs. white wine vinegar
- 1/4 cup vegetable oil
- 1/2 cup crumbled blue cheese
- Chips (I recommend Terra veggie chips, available at most grocery stores)
- Salt and Pepper 


First thing’s first – cook your lobster tails. Boil water (and add a pinch of salt), then add the tails. Cook 5-7 minutes for a 4-6 oz. tail.While you are cooking the lobster, make your salad dressing.
 

Whisk together 1 1/2 tbs. mayonnaise and 1 tbs. of white wine vinegar.  Slowly add the vegetable oil while whisking, then add the blue cheese and mix it all together.  And keep it chunky--it's much better that way.  Set aside for the time being. 


When the lobster is done, pull it out and let it cool--you don't want to burn your hands when you pull out the meat from the shell.


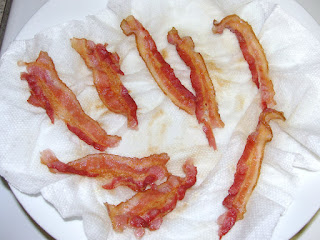
While the lobster is cooling, make the bacon--the easy, microwaveable way.  Grab two paper towels--put one down on a plate, put the six slices of raw bacon on top, then cover with the other paper towel.  Microwave for about3-4 minutes.  I like my bacon crispier on a salad, but it's ultimately up to you.


Go ahead and start to prepare your salads.  Pull out enough butter lettuce from the bag to go on the sandwiches (about a handful or two).  Then divide the rest up into two plates/bowls.  Go ahead and divide up the cherries into each plate/bowl.  Do the same with the bacon—add three slices to each plate, but crumble it up/tear it apart before you add.  (You can also wait to add some of the cherries and bacon until you have added the dressing.)

By now, the lobster should have cooled down a bit.  Take some kitchen shears (aka scissors) and cut down the middle of the hard shell starting at the top and working your way down toward the end of the tail.  Now your hands are going to get a bit dirty.  Just work your way down the shell towards the tail with your hands, ripping towards the sides and trying to pull out the meat as you go along.  Your last pull should pull out the whole tail’s worth of meat from the very end of the tail.
  

Chop up the lobster into bite size pieces and add to a medium/large mixing bowl.  Now pull out your imitation crab meat package and throw those into the bowl.  Add the remaining 3 tbs. of mayo and some salt and pepper.  Mix well.
   

Heat up your oven broiler, slice up your sub rolls, and let them toast for a couple of minutes (I always like my bread toasted).
  

While broiling, top your salads with dressing.  Then grab the buns out of the oven and put 'em on a couple of plates.  Add the lettuce you set aside earlier to the rolls, then add your lobster/crab mixture.  Pour out some chips on the side and grab your salad--you are ready to EAT...and to be an AMERICAN.
  

Credits: My Blue Cheese Butter Lettuce Salad recipe is adapted from a Bon Appétit recipe that I found online.  The photos are of our cooking process.

Friday, July 9, 2010

Parrilla Style Steak with Chimichurri Sauce, Onion Rings, and Broccoli


So this is my first official blog entry. I have debated with myself on how to begin, but relatively quickly I decided to focus on perhaps the most amazing item of culinary genius: STEAK.


Now, most of you know what STEAK is (sorry veg-heads). But I’m not talking about just any steak. I’m talking about ARGENTINE beef. I’m talking about one of the sides of the fantastic cow meat triangle—maybe even the hypotenuse. The other two legs of the triangle are, of course, U.S. and Japanese beef (Texas and Kobe are among the best). I don’t include France here—they got the cut right (filet mignon is what I have tried to order at every restaurant since age 8), but long ago these three nations took over the meat supply, in my humble opinion. I also don’t include Australia/New Zealand because my only experience with these countries’ beef supply has been at Outback Steakhouse. They carry a large share of world beef exports, but sorry, guys—I’m going with quality over quantity/Bloomin’ Onion.* I am also excluding Brazilian beef from my list…this is a subject for another blog entry that focuses on churrasco (DELICIOUS).

*This statement may be amended on a future trip to Australia/New Zealand.

Now back to my focus: Argentine beef. Good meat is good meat, but there’s something about the barbeque flavor that one finds in a typically prepared Argentine steak. On a recent trip to Buenos Aires, I discovered that parrillas (steakhouses, also known as parrilladas) are practically like fast food restaurants in the United States – they are EVERYWHERE. Unlike fast food restaurants, though, they feature meat that comes from a more appealing part of the cow…and food that is edible. Parrilla also refers to the barbecue style in which the meat is cooked—and it all starts with the marinade. And it ends with Chimichurri sauce, the delicious Argentine version of A1 Steak Sauce (it’s very different, but just as common and lighter and more delicious and I really like it). Papas fritas (French fries) are a popular side dish at a parrilla, so I decided to put a twist on this and make gourmet onion rings. And even though the Argentines don’t seem to eat a lot of veggies (and by don’t seem, I mean they really don’t), I can’t really handle a meal without something green. So I made some super easy broccoli. Now on to my recipe…

Steak, Parrilla style:
- steak of your choice (we used skirt steak)
- Italian salad dressing
- garlic (minced)
- parsley
- oregano
- salt and pepper

Chimichurri Sauce (enough for 2-4 people):
- 1 cup parsley
- 1 tbs. oregano
- 1 tsp. crushed red pepper
- 5 tsp. minced garlic
- 1 tsp. salt
- ¼ cup olive oil
- 2 tbs. + 2 tsp. vinegar

Onion Rings (enough for 2 people):
- Vidalia onion
- 2 tbs. parsley
- 1 tbs. oregano
- milk
- flour
- medium bottle of vegetable oil

Super Easy Broccoli:
- broccoli (one crown is good for 2 people)
- 1 tbs. butter
- salt and pepper

Notes: If possible, prepare marinade the night before. Parsley and oregano are used throughout this recipe—buy one bunch of parsley and one of those small herb containers of oregano. That will be plenty. I also suggest having a container of minced garlic. Saves you a LOT of trouble for this meal and future recipes. An oil thermometer can be bought at the grocery.

Many different types of beef will work for this recipe—I went with skirt steak. We were cooking for two, so we picked up a package of skirt steak for about $12 or so from the grocery. Parrilla is all about the marinade…assuming, of course, that you have already prioritized the meat. I have a distaste for exact measurements when it comes to a marinade, so my recipe will be somewhat vague. Grab a large ziplock bag, throw in the steak and then add Italian salad dressing, minced garlic, parsley, oregano, salt, and pepper. The amounts you put in will depend on the size of the steak—just add so that the Italian dressing is coating the entire steak and so that you can see bits of garlic, parsley and oregano speckled across the meat. Don’t be shy with the salt and pepper. I highly recommend that you prepare the marinade the night before you plan to cook the meal. If you don’t have that much time, at least give it a few hours in the fridge. Oh, and make sure you SEAL the bag!


OK – you have waited a full day and you can’t stop thinking about how delicious tonight’s meal will be. I get it. I pulled out the Panini press (remarkably similar to a George Foreman grill) to cook the steak, but you can also use a grill pan or grill if you are lucky and have a back yard. While the grill of your choice is heating up (medium to medium-high heat on my press), start preparing the onion rings. I have a pot with a fry basket—you could also just use a pot and tongs for this. Add veggie oil into the pot. Psychologically it’s weird to use that much oil, but veggie oil is only a couple of bucks. Put the burner on medium / medium-high and insert your oil thermometer—you will be ready to fry when the thermometer hits 300° F.


Cut up the onion into…you guessed it! Rings! They should be about ½ inch thick or so.


Separate the rings and put them into a small mixing bowl. Pour in some milk on top of the onions. Grab a small plate and pour out some flour. Chop up some parsley and oregano (get all of the herb chopping done now, then separate the amount needed for the chimichurri sauce). Grab an onion ring (make sure it’s got some milk on it), dip it in the flour and coat, then transfer to another plate.


Repeat for all rings. Then sprinkle herbs on top (or you can dip the flour-coated rings in the herbs as you go).


While the oil and grill are heating, make the chimichurri sauce. Mix together the aforementioned herbs, red pepper, minced garlic, salt, olive oil, and vinegar. And that’s it.


OK back to the STEAK. Your grill should be heated up – I will let you decide how to cook your steak since I don’t know what kind of grill or cut of meat you have. I like my steak rare, so I cooked my inch-thick steak for about 3 minutes on medium / medium-high heat on the Panini press. Just remember – you can always cut through a portion of the meat to check on the doneness!


While the steak is cooking (and once the oil is heated up), add the onion rings to the pot of oil. You may have to cook them in two batches, each batch for 3 minutes. Remove rings to a paper towel coated plate.


I needed to add some greens to this dish, so I made my patented super-easy broccoli. Wash and cut up some broccoli, put it in a small corning ware dish, put a tablespoon of butter on top, add some salt and pepper, put on the cover, and microwave for 3 minutes. You can do this as the onion rings and steak are cooking—the prep time is literally about a minute. And it’s delicious.


You are done! Serve the delicious steak with chimichurri sauce and a side of gourmet onion rings and broccoli. And MAKE SURE you pull out a bottle of Malbec!

Credits: My Argentine Steak and Chimichurri Sauce recipes are adapted from a Better Homes and Gardens recipe that I found online. The onion rings recipe is loosely based on a Williams Sonoma cookbook recipe. The two “STEAK” photos are of food we ordered at Cabaña Las Lilas in Buenos Aires, Argentina. The rest of the photos are of our cooking process.