Tuesday, August 31, 2010

Grilled Lamb Kebabs and Blue Cheese Nectarines


In theory, I love the fact that my apartment has a balcony.  The problem is that I can't put a big, fat grill on it.  How do I make do?  Occasionally with my panini press (featured in my first blog entry), but more often than not with my double-wide grill pan.  And some aluminum foil.

In this post, I am sharing with you two of my favorite summer grill specialties (without the fancy schmancy grill).  By the title of this blog post, I'm sure you have gathered that one of these little pieces of heaven is the lamb kebab.  Yes, I cooked with lamb in my last blog post.  And yes, it was delicious.  Which is why I'm cooking with it again.  

Oh, and I should also mention the fact that lamb is the traditional meat used in kebabs.  "Kebab" is actually a Persian word, but it is used to reference a plethora of Middle Eastern dishes.  In the United States, the term "kebab" generally refers to the shish kebab, aka delicious meat (and sometimes vegetables) on a stick.  "Shish" is of Turkish decent and essentially means "skewer."  Check out Wikipedia for some more undocumented history and interesting facts, including that the world's largest shashlik (a shish kebab variety) was approximately 394 feet long: "called the Shashlik of Friendship, it was cooked in April 2009 in Cherkessk, Russia.  It took approximately 400 kg of meat to produce this shashlik."  In terms of length, my kebabs pale in comparison.  But I bet mine were much tastier.

I also cooked up some grilled nectarines.  Nectarines, you say?  Yes.  You can do more than just pull the sticker off, rinse, and bite.  You can grill them and stuff them with cheese.  And let's face it, most things are better when stuffed with cheese.  Check out what Wikipedia had to say about nectarines (a smooth-skinned peach variation): "The scientific name persica, along with the word 'peach' itself and its cognates in many European languages, derives from an early European belief that peaches were native to Persia. The modern botanical consensus is that they originate in China, and were introduced to Persia and the Mediterranean region along the Silk Road before Christian times."  I'm (pretty much) following my Persian theme.  Just ignore my former post about blue cheese...(OK, OK, Georgia peaches and good ol' American grilling...I'll tag this as American food, as well...)

Ingredients (for 2-4 people, depends on how hungry you are...makes about 8 kebabs):

- Nectarines (one per person)
- Small container of blue cheese crumbles (3-4 tbs. per nectarine)
- Butter (one tbs. per nectarine)
- 1 lb. boneless leg of lamb
- 2 tbs. minced garlic
- 1 tsp. ground coriander
- Extra virgin olive oil
- Salt and pepper
- 1 large red bell pepper
- 1 red onion
- Wooden skewers (they look like long toothpicks and are super affordable)

First thing's first--you need to cut up and marinate your lamb for a few hours.  Trim some of the fat off of your lamb and cut it into 1-1/2 inch cubes.  Throw it in a gallon-sized baggie and add the garlic, coriander, 1 tsp. of salt, and 1 tbs. of oil.  Give the bag a shake.


Refrigerate for 2-4 hours.  At the tail end of your marinating time, you should go ahead and chop up the bell pepper and red onion into chunky pieces.


Then you should start working on the nectarines.  I highly recommend grilling them, and then giving into the temptation of eating them before/while you start cooking the lamb.  Heat up a grill pan or mini grill or the REAL THING to medium heat.  Cut your nectarines in half and remove the seeds.  You may want to scrape out the middle of the nectarine halves a bit so that you can eventually fit more cheese.  More cheese, you say?  Okay, clearly you should do this.


In your microwave, melt a tablespoon of butter per nectarine (1 tbs. for two nectarine halves).  Brush half of the melted butter on the fleshy side and then place the fleshy side face down on the grill and brush the skin side with the rest of the melted butter.


Grill for five minutes and then turn over.


Sprinkle blue cheese (about 1-2 tbs. per half) on top of the nectarines--blue cheese crumbles should fit nicely in the middle where the seed was formerly located.  Grill for another five minutes so the cheese starts to melt.  Then don't hold yourself back and immediately chow down. 


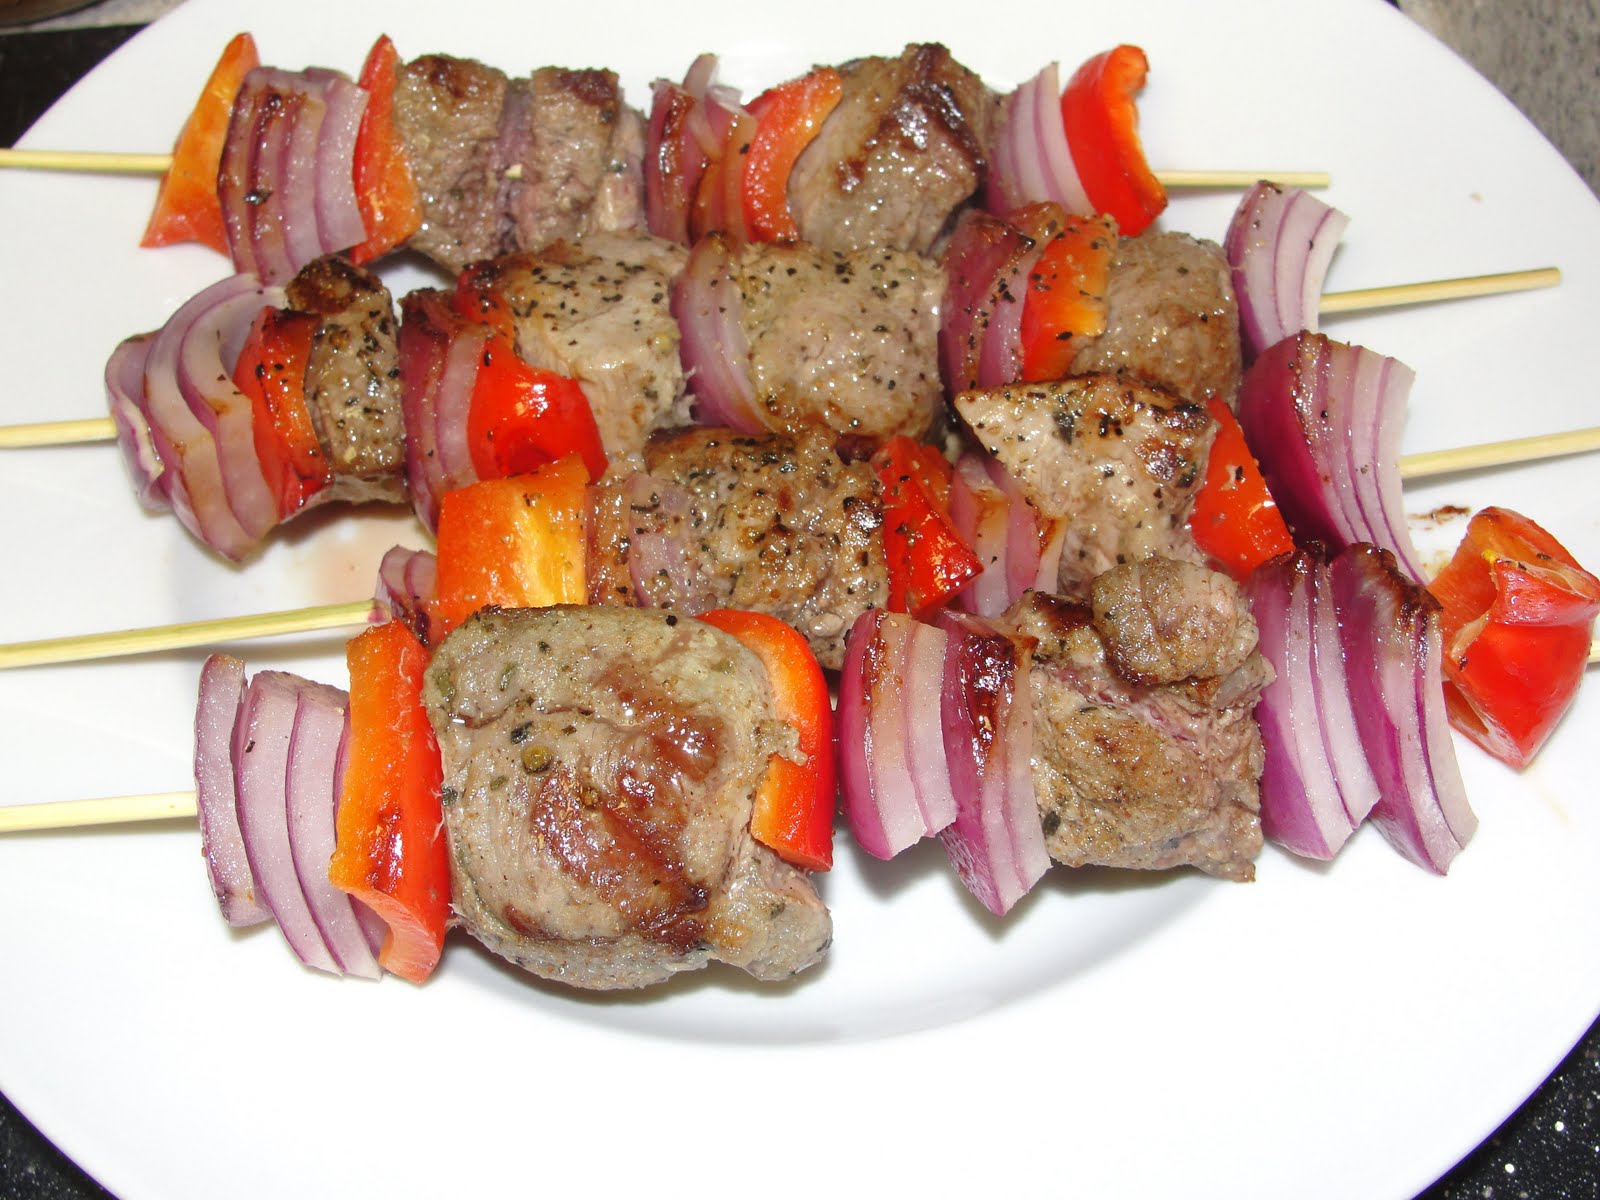
As you are eating, you should probably start cooking your lamb.  Turn up the heat on your grill pan to medium-high.  Pull out your wooden skewers and alternately thread lamb chunks, peppers, and onions.  There is no right way to do this--just do it.


After threading, grab some more olive oil and lightly brush your kebabs.  Sprinkle with a bit more salt and some ground black pepper.  Then throw them on the grill!  


I recommend covering them with a sheet of aluminum foil if you are cooking on a grill pan (this way, the heat doesn't escape and they cook more evenly).  Make sure you turn them occasionally--it should take about 8-10 minutes for medium-rare meat.  


Feel free to cut through a piece to make sure you have cooked your kebabs to your desired doneness.  بفرمایید (Berma’id, or "Enjoy!" in Farsi)!

Wednesday, August 18, 2010

Lamb Tagine with a Chickpea Okra Fry


I am officially delving into the cuisine of a new continent, one to which I have not (yet) traveled.  In honor of my coworker's upcoming trip, I have officially experimented with Moroccan and North African cuisine.  This is a big step for me--I don't think I have ever cooked a legitimate Moroccan dish.  And I guess I didn't legitimately cook a Moroccan dish this time either because I don't own a tagine.

According to the all-knowing Wikipedia, "The traditional tagine pot is formed entirely of a heavy clay, which is sometimes painted or glazed.   It consists of two parts: a base unit that is flat and circular with low sides, and a large cone or dome-shaped cover that rests inside the base during cooking.  The cover is so designed to promote the return of all condensation to the bottom. With the cover removed, the base can be taken to the table for serving."

Okay, I have to admit that it would be super-cool to own a tagine (kind of like it would be super-cool to own a huge wood-burning oven to cook pizza or, let's say, Peking duck).  But where would I fit it?  Not in my 844 square foot apartment, that's for sure.  The dilemma resulted in the use of an All Clad 4-quart sauté pan.  Hardly authentic, but it would have to do.

Moroccan lamb dishes are unbelievably tasty.  I am partial to lamb, in general, so I chose it for my North African endeavor.  I also elected to cook up two other traditional North African ingredients: okra and chickpeas.  As they say in Arabic, استمتع (Istamti), which means "Enjoy!" 

Ingredients (Serves 4 People):

Lamb Tagine:
- 4 lamb shoulder chops
- Minced garlic (4 tsp. or 4 cloves)
- 1 tsp. cinnamon
- 1 tsp. ground ginger 
- 2 tsp. ground coriander
- 2 tbs. parsley (dried or fresh)
- 1 onion
- 2 1/2 cups beef stock (or lamb stock if available)
- 1 cup shredded almonds
- 2 tsp. sugar
- Olive oil
- Salt and pepper

Chickpea Okra Fry:
- 1 lb. okra
- 1 onion, roughly chopped
- 2 vine tomatoes, roughly chopped
- 1 green chili pepper, minced
- 1-inch piece of root ginger. minced
- 1 tsp. minced garlic
- 1 tsp. ground cumin
- 1 tsp. ground coriander
- 15-ounce can of chickpeas
- 1 tbs. butter
- 2 tbs. vegetable oil
- Salt and pepper

I highly recommend serving this dish with long grain white rice.  I just cooked a couple of cups in my rice cooker--super easy!  Also, you will only see two chops in my photographs because we cooked the next two the following night.  But this recipe should work perfectly for four people!

A few hours in advance (or the night before), you will need to prepare the marinade for the lamb.  In a small bowl, mix together the garlic, cinnamon, ginger, coriander, and a bit of salt and pepper. 


Finely chop up the onion.  Grab two gallon-sized baggies.  Rub the lamb shoulders with the garlic-spice mixture and then place two of the chops in each bag.


Add a tbs. of parsley and half of the chopped onion into each bag.  Seal the bags and shake them up to make sure that the ingredients evenly coat the lamb chops.  Put the bags in the fridge until you plan to start cooking.
 

Now that the lamb has marinated for at least a few hours (or overnight), you are ready to start cooking.  Heat up a few tbs. of olive oil in a large sauté pan on medium heat.  Add the lamb chops and the contents of the bags into the pan.  Fry each side of the lamb chops for 2-3 minutes.


Add the beef (or lamb) stock and lightly simmer for 30 minutes.  This will cook the lamb to a perfect medium/medium-rare (depending on the thickness of the cut).


While the lamb is cooking, start chopping.  Focus first on the onion and ginger, then on the tomato, chili, and okra.  The okra should be sliced at a slant.


First add the vegetable oil and butter to a large frying pan over medium heat.  Melt the butter and then add the garlic, ginger, and onion.  Cook for about 5 minutes until the onion starts to soften and slightly brown.  Then add the tomatoes and the chili and give it a quick stir.


Now add the okra, cumin, coriander, and some salt and pepper.  Give it a stir and cook for another 5 minutes.


After the 5 minutes are up, add the chickpeas and cook for another 5 minutes.


At this point, the 30 minutes of cooking the lamb should be up.  Remove the lamb chops and cover with foil to keep them warm.


Now let the sauce reduce a bit more (for about 5 minutes or so).


While the chickpea okra fry is finishing up and the sauce is reducing, pull out a small frying pan and brown the almonds over medium-low heat.  This is not an exact science--keep a watchful eye and remove the almonds once some of them start to brown (should be around 5 minutes).


At this point, everything should be done!  As I mentioned earlier, I cooked some long-grain rice in my rice cooker.  Yummy AND easy!


And your chickpea okra fry should look deliciously like this:

Grab a plate and serve it up!  Make sure to top with sauce and almonds.


Credits: My Lamb Tagine and Chickpea Okra Fry recipes are adapted from the cookbook, Around the World in 450 Recipes.  The photos are of our cooking process.

Saturday, August 7, 2010

Decadent Banana Bread


I LOVE Banana Bread. And anyone who doesn't love banana bread must be allergic to gluten. Let me rephrase that--they probably still love banana bread, but after eating it one glorious time, they got really sick and, therefore, could no longer eat it. Unbelievably sad.

According to the all-knowing Wikipedia, banana bread emerged as a standard American cookbook feature once baking soda and powder became popular in the 1930s. No one knows from whence the first loaf of banana bread came, but some speculate that it originated from housewife experimentations with pearlash (aka potassium carbonate) in the 18th century. Who are these "some"? Where did they get their information? I guess we will never know...but for all intents and purposes, banana bread is clearly an American favorite. Who knew it had such a strange and mysterious history? I could delve into the history of the banana, but I don't want to get too political.

Most banana breads contain nuts, chocolate chips, or neither. But I put a bit of a spin on mine, which makes my recipe more dessert-worthy (and decadent breakfast-/brunch-worthy): I add chocolate chips and butterscotch chips. Feel free to substitute nuts or different chip combos--but I doubt you'll find a better combination than mine.

Loaf of Decadent Banana Bread:

- 2 1/2 cups of flour
- 1 cup of sugar
- 3 1/2 tsp. of baking powder
- 1 tsp. of salt
- 3 tbs. of vegetable oil
- 3/4 cup milk
- 1 egg
- 2 ripe bananas
- 1/2 cup semi-sweet chocolate chips
- 1/2 cup butterscotch chips


Preheat your oven to 350°. In a large mixing bowl, add the flour, sugar, baking powder, vegetable oil, milk, and egg. Now add your chips.


Peel your bananas and add them to the bowl.


Take out a potato masher and use it to mash the bananas and mix together the ingredients.


Once the bananas have been sufficiently mashed, you may want to switch to a mixing spoon. Make sure that the mixture is well-mixed, but small lumps/chunks of bananas are okay. I like the lumps!


Grease one of your typical-sized loaf pans (approximately 8.5"x4.5"x2.75"H). Pour the mixture into the pan and make sure that it is spread out evenly.


Once the oven is preheated, bake for about an hour. I will sometimes check the loaf at 50 minutes just to make sure it doesn't become overcooked.


To make sure you have made the perfect loaf, stick a knife into the middle and a little bit of batter should coat the knife--it shouldn't be cooked all the way through (you don't want it to be too dry), but the knife shouldn't come out with a bunch of batter all over it. It's not an exact science by any stretch. But trust me--you want it on the gooey side more than you'd want it on the dry side. Gooey is delicious. Wait a few minutes for the bread to cool down a bit, then slice it up and serve!